How to Build a Wood-Fired Sauna in the UK

Building your own wood-fired sauna is one of the more achievable self-build projects. The structure is small, the materials are widely available in the UK, and the core principles — keep the heat in, keep the moisture out — are straightforward once you understand them.
What catches people out is the detail. A vapour barrier on the wrong side of the insulation will rot the frame within a few years. An undersized stove will never reach proper temperature in a British winter. A foundation on unprepared clay will shift and jam the door within months. These are all avoidable problems, but only if you know about them before you start.
This guide covers the full build sequence for a wood-fired sauna as a garden outbuilding — from the ground up to the first session. It is aimed at self-builders and informed buyers who want to understand what good practice looks like before they commit to a design, a kit, or a builder.

Foundations and base
The foundation does more work than you might expect. A wood-fired sauna concentrates serious weight in one spot — the stove and stones alone can weigh 100–250 kg. The base must handle that load while managing seasonal soil movement and drainage in the UK climate.
Four foundation types are common for garden saunas in the UK:
Gravel pad
The simplest and cheapest option. Excavate 150–200 mm of topsoil, lay geotextile membrane, fill with 100–150 mm of compacted MOT Type 1, and extend the pad 300–600 mm beyond the sauna footprint. Drainage is excellent by design, which matters in a wet climate. Cost runs roughly £250–£500 for a typical sauna footprint.
The catch: gravel pads can settle on soft ground and need edging to stop the aggregate spreading. They work well on sandy or gravelly soils but are not suitable for peat or soft clay without significant additional preparation.
Timber frame on piers
Pressure-treated bearers sitting on concrete pad blocks or piers, with airflow underneath. The raised floor reduces rot risk and allows easy routing of services. Materials for a 3 m × 4 m frame run £300–£600.
Piers must be set deep enough to avoid frost heave — at least 450 mm in most UK soils. On clay, they need to be deeper or you will get seasonal movement that racks the structure and jams doors.
Screw piles
Galvanised steel helical piles screwed into the ground, topped with timber bearers. Minimal excavation, fast installation (hours rather than days), and excellent on clay, sandy, or sloping ground. Professional supply-and-install runs £1,200–£2,500 for a small sauna. DIY piles are available from around £38–£50 each.
Screw piles are the preferred option on clay soils, near trees, or on sloping sites. They bypass the shrink-swell zone that causes problems for shallow foundations.
Concrete slab
A 100–150 mm reinforced slab over compacted sub-base with a damp-proof membrane. The most stable option, especially for heavy stoves, but the most disruptive to install and the slowest (7–28 days curing). Cost: £600–£1,200 DIY, £1,500–£3,000 professional.
A slab drains poorly unless you form a gradient of at least 1:80 during the pour. Without that, water pools against the timber and accelerates rot.
Ground preparation
UK soils vary significantly. The two things that matter most are bearing capacity and drainage.
Clay soils (common across the Midlands, Southeast, and London basin) swell when wet and shrink when dry, with seasonal movement of up to 75 mm. Shallow pad foundations on clay are a documented failure mode — settlement of just 5 mm can warp a timber frame enough to gap precision-cut joints. Screw piles at 1.2–1.7 m depth are often the best option.
Sandy soils (Norfolk, Suffolk, parts of Surrey) drain well and have good bearing capacity. Almost any foundation type works. A gravel pad is usually sufficient.
Peat and soft ground (parts of Scotland, Northern England, Somerset Levels) have poor bearing capacity and are usually too soft for conventional foundations. Screw piles driven through to firmer ground beneath are the standard approach.
Drainage
The UK receives over 1,100 mm of rainfall annually. Finished ground level should slope away from the sauna at roughly 1:40. On clay or in areas that pond, a French drain on the uphill side intercepts water before it reaches the base. Keep the bottom edge of any timber cladding at least 150 mm above ground level — the same principle as a domestic damp-proof course.

Structure and framing
The structural choice balances three things: thermal performance, build speed, and long-term moisture management. In the UK climate, the last of these tends to be the deciding factor.
Stud frame with cladding
The most flexible method for UK self-builds. Use 100 mm × 50 mm or 150 mm × 50 mm studs at 400–600 mm centres. The wall build-up from inside to outside: T&G sauna panelling, air gap on battens, aluminium foil vapour barrier, mineral wool insulation, structural sheathing, breather membrane, ventilated cavity, external cladding.
This gives you full control over insulation depth, vapour management, and cladding choice. It also produces the fastest heat-up time because there is less thermal mass to warm through. The trade-off is more layers and more opportunities to get the vapour control wrong.
Log cabin
Prefab kits with interlocking log boards (44–70 mm thickness). Simple to assemble — two people can put one up in a day or two. The thermal mass of solid log walls absorbs and re-radiates heat, which some bathers prefer.
The main issue is that log walls settle 10–20 mm per metre of height over time, and the joints are prone to air leakage. A 44 mm log wall has limited insulation value on its own — adequate for summer but slow to heat in a British winter. For year-round use, consider a twin-skin approach with insulation between.
SIP panels
Structural insulated panels (OSB skins with a foam core) go up fast and offer excellent thermal performance. But the sauna interior still needs a separate vapour barrier and T&G lining, and the foam core has a temperature limit of around 100 °C. SIPs work well as the external shell, with the sauna build-up applied inside.
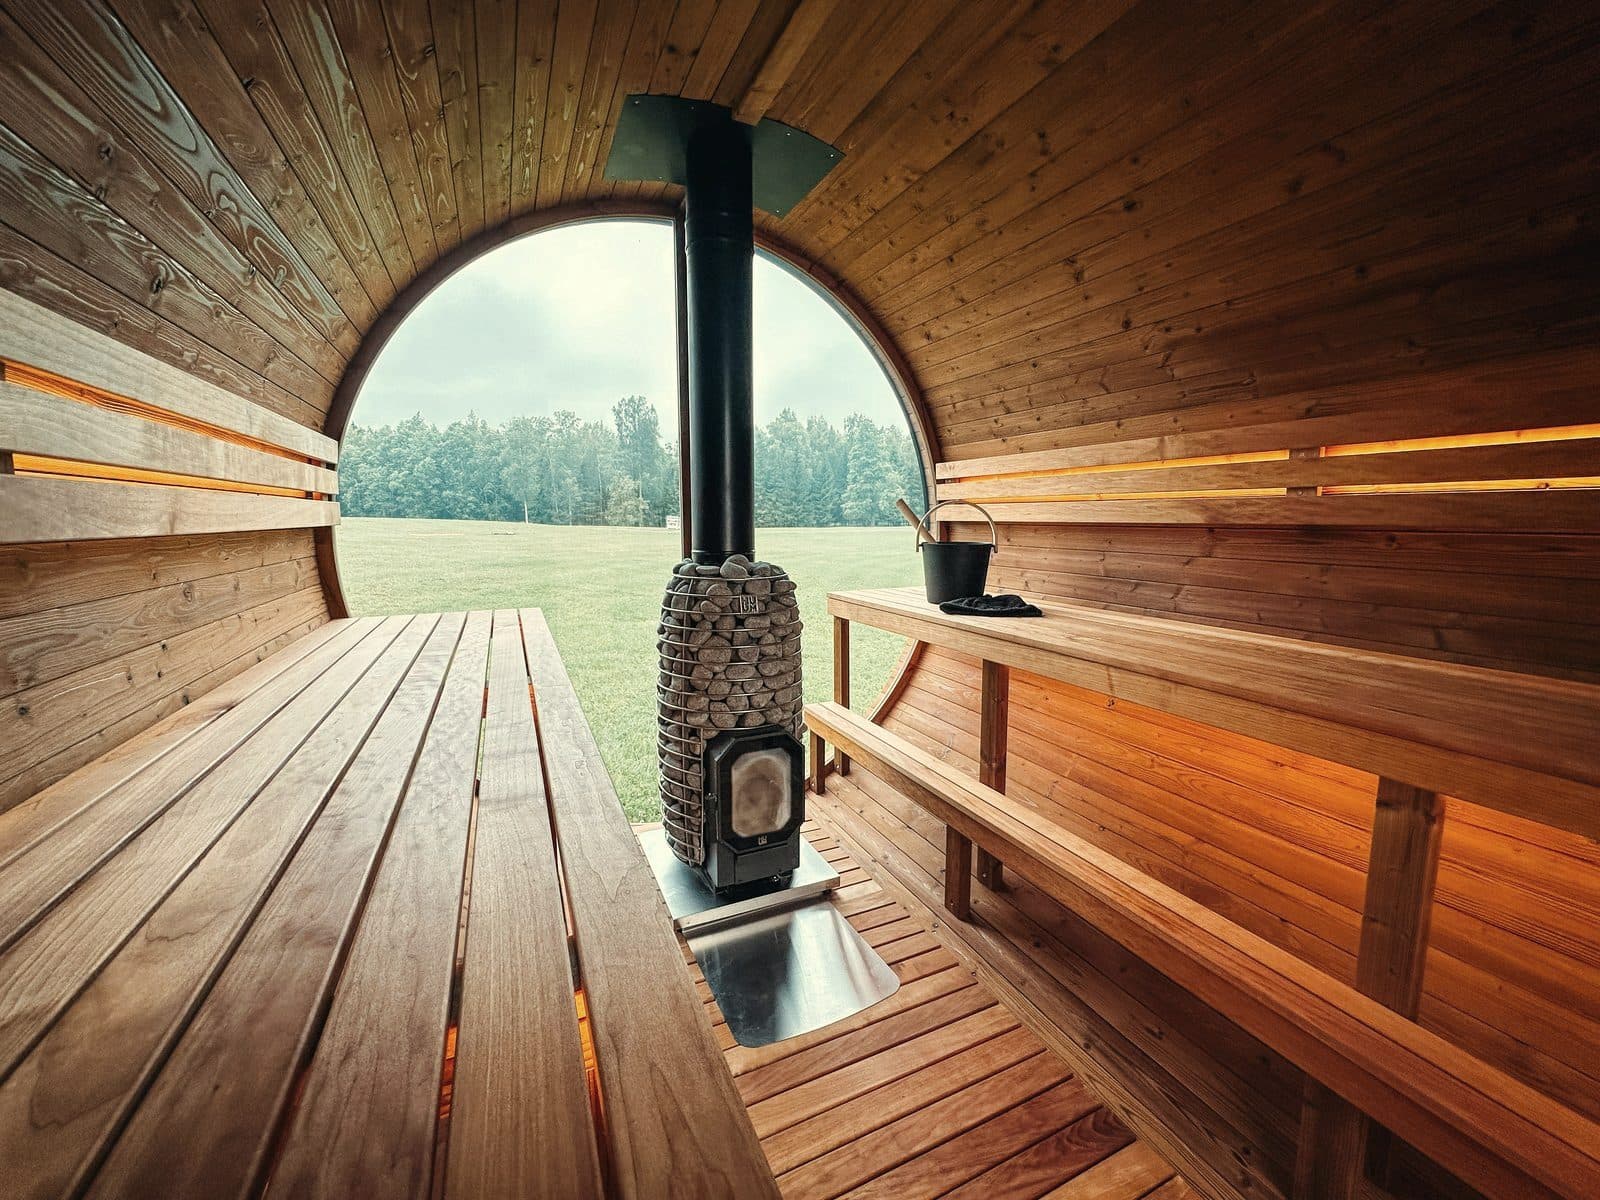
Barrel construction
Curved staves held by stainless steel tension bands. Barrels heat up fast (30–45 minutes) thanks to their efficient volume-to-surface ratio. But they are generally uninsulated, offer limited bench configuration, and are notorious for leaking in UK driving rain without a full bitumen or shingle roof covering to protect the end-grain.
Cabin sizing
Internal dimensions determine stove sizing, ventilation requirements, and bench layout. The key measurement is internal volume (length × width × ceiling height), not floor area.
- 2-person: 1.5 m × 1.5 m to 1.8 m × 1.8 m (roughly 5–7 m³)
- 4-person: 2.0 m × 2.0 m to 2.0 m × 2.5 m (roughly 8–12 m³) — the sweet spot for a family build
- 6-person: 2.5 m × 3.0 m or larger (roughly 16–22 m³)
Ceiling height should be 2,100–2,300 mm. This is a functional requirement, not just a convention. Too high and the hot air stays above the upper bench, leaving bathers in a cool pocket. The distance from the upper bench surface to the ceiling should be 1,050–1,200 mm — roughly two stacked fists above the head when seated.
Timber species
Different timbers suit different parts of the build.
External cladding: Thermowood (heat-treated pine or spruce) is the most widely used option for UK conditions — dimensionally stable, rot-resistant, resin-free, and no chemical treatment. Around £28–£39/m². British larch is a more affordable alternative at £12–£28/m² but has higher resin content and more variability. Siberian larch is largely unavailable due to trade restrictions; Douglas fir is the usual substitute.
Internal lining: Scandinavian spruce is the standard budget option at £15–£25/m². Western red cedar is naturally durable with low resin content, but significantly more expensive (£34–£78/m² depending on source and grade).
Benches: Aspen or alder are the correct choice. They have low thermal conductivity — they stay comfortable to sit on at 80–100 °C — and produce no resin. Thermo-aspen (heat-treated) adds durability. Avoid pine, spruce, or larch for bench surfaces — the resin bleeds at sauna temperatures and can cause burns.
All timber should be kiln-dried to below 20% moisture content. Never use pressure-treated timber inside the hot room — the preservative chemicals off-gas at sauna temperatures.

Insulation and vapour control
This is where UK builds fail most often. The combination of high internal humidity and a cold, damp external climate creates a severe moisture drive through the walls. Get the vapour barrier wrong, and the frame rots from the inside out within 3–5 years — often invisibly until the damage is serious.
Insulation
Mineral wool (stone wool / rock wool) is the standard. It is non-combustible, withstands temperatures well over 1,000 °C, and does not off-gas. Use 100 mm in walls and 150 mm in the ceiling, at a density of 45–60 kg/m³ to prevent slumping. Products like Rockwool RWA45 cost around £5–£11/m².
Standard PIR boards (Celotex, Kingspan construction products) should not be used in the hot room walls or ceiling. At sustained sauna temperatures, standard PIR can begin to degrade and release toxic combustion products. If rigid foam is needed for thickness reasons, use sauna-specific PIR products (such as Kingspan Sauna-Satu) that are engineered for the temperature range.
EPS and XPS polystyrene are completely unsuitable — EPS begins structural degradation at around 85 °C, well within sauna operating range.
Vapour barrier
Aluminium foil is non-negotiable. It blocks moisture, reflects radiant heat back into the room, withstands sauna temperatures (aluminium melts at 660 °C), and does not off-gas. Use a minimum thickness of 0.03 mm (30 microns); paper-backed foil is easier to handle without tearing.
Standard polyethylene vapour barriers must not be used. LDPE softens at 105–115 °C — within reach of ceiling temperatures in a well-heated sauna. Temperature cycling causes progressive degradation even before the melting point.
Where it goes
The foil goes on the warm side of the insulation — between the insulation and the interior panelling. Shiny side facing inward. All joints must overlap by at least 50 mm and be sealed with high-temperature aluminium tape (not standard duct tape, which fails in heat).
Placing the vapour barrier on the cold side (exterior) is the single most serious construction error. It traps moisture inside the wall cavity, saturates the insulation, and rots the framing. This is specifically called out in every credible source as the primary cause of premature structural failure.
The air gap
Between the foil and the interior T&G panelling, you need a 15–25 mm air gap created by battens (furring strips). This gap allows the foil to reflect radiant heat effectively and prevents moisture being trapped against the back of the cladding. Without it, the panelling rots from behind.
The full wall assembly
From outside to inside, the correct build-up is:
- External cladding
- Ventilated air gap (minimum 25 mm, on battens)
- Breathable membrane (e.g. Tyvek)
- Structural sheathing (OSB or ply)
- Timber frame with mineral wool insulation
- Aluminium foil vapour barrier (shiny side in, all seams taped)
- Battens (15–25 mm air gap)
- Interior T&G panelling (aspen, alder, or spruce)
The principle: one impermeable layer on the warm side, a breathable path outward. Never two impermeable layers — that creates a moisture trap with no drying path.
Ventilation
Ventilation in a wood-fired sauna is not optional. It serves three functions: supplying oxygen for the fire and bathers, distributing heat evenly, and drying the structure after use. A wood-burning stove consumes roughly 10 m³ of air per kilogram of firewood burned — without a supply of fresh air, the fire struggles, CO&sub2; builds up, and the air feels heavy and stale.
How it works
Fresh air enters low down near the stove, is heated on contact, rises through the room, and exits through an exhaust vent on the opposite wall. The stove drives natural convection — hot air rises, cooler air is drawn in to replace it.
Vent placement
For passive (gravity) ventilation — the most common and reliable setup for wood-fired saunas:
- Intake: 50–300 mm from floor level, near or behind the stove. The incoming air contacts the hot stove immediately and enters the room already warmed.
- Exhaust: On the opposite wall. For better heat distribution, place it at around 400 mm above floor level (under the benches) rather than near the ceiling. This forces hot air to circulate down past the bathers before exiting, reducing the temperature gap between head and feet.
A secondary drying vent near the ceiling (kept closed during use, opened after) helps clear moisture when the sauna is cooling down.
Vent sizing
Target roughly 6 air changes per hour. The exhaust vent should be the same size or slightly larger than the intake.
- 2-person sauna (6–8 m³): intake ~130 cm² (e.g. 130 mm diameter), exhaust ~150–200 cm²
- 4-person sauna (10–14 m³): intake ~170–250 cm² (e.g. 150 mm diameter), exhaust ~200–300 cm²
- 6-person sauna (16–22 m³): intake ~250–400 cm² (e.g. 200 mm diameter), exhaust ~300–500 cm²
Vents should have adjustable dampers (wooden sliding panels — not plastic, which deforms at temperature) so you can control airflow during the session and open everything fully for post-use drying.
Mechanical ventilation
Mechanical exhaust fans can provide more even heat distribution, with the intake placed above the stove and a fan extracting from under the benches. However, in wood-fired saunas there is a safety consideration: a fan creating negative pressure can compete with the stove's draught, potentially pulling combustion gases into the room. Approved Document J warns explicitly that extract fans can cause spillage of combustion products from open-flued appliances. Passive ventilation is simpler and safer for most self-builds.
Combustion air
Approved Document J requires a permanently open vent of 550 mm² per kW of stove output for airtight structures. For a 10 kW sauna stove, that is 5,500 mm² (55 cm²) of permanent ventilation to outside air, purely for combustion. This is separate from the room ventilation for bather comfort.

Stove and chimney
The stove is the heart of the sauna. Get this right and everything else follows; get it wrong and no amount of good construction will compensate.
Sizing
Start with internal volume (length × width × height in metres). Then add penalty adjustments: +1.0 m³ per m² of glass (doors or windows) and +1.2 m³ per m² of uninsulated log wall. Select a stove rated for the middle of your adjusted volume range — not the edge.
An undersized stove will struggle to reach proper temperature in cold weather. An oversized stove will overheat the room before the stones are fully charged, producing harsh flash steam rather than the soft rolling steam that comes from deeply heated stone mass.
What is available in the UK
All sauna-specific wood-burning stoves sold in the UK are imported from Finland or Estonia. The main brands:
- Harvia — the world's largest manufacturer. The Harvia M3 (13 kW, 30 kg stone capacity, heats 4.5–13 m³) is the best-selling model and often the starting point for self-builds. From around £460–£760 depending on supplier.
- Narvi — Finnish, with a reputation for clean burning. The NC series (16/20/24 kW) starts from around £725. UK distribution through Finnmark Sauna.
- HUUM — Estonian, known for high stone mass and a distinctive rounded design. The Hive Wood 13 kW holds 90 kg of stones. From around £1,000–£1,760 depending on supplier and model.
- IKI — Finnish, hand-made, open mesh-frame design. The IKI Original holds up to 240 kg of stones — the highest stone mass of any commonly available stove. From around £1,260.
Stone mass and type
More stones means longer heat retention and softer steam, but also longer heat-up time and more weight on the foundation. Compact stoves carry around 30 kg; large cage-style stoves can hold 200–340 kg.
Use olivine diabase — a dense igneous rock that handles repeated thermal shock and water contact without cracking. Never use river stones, limestone, sandstone, or random garden rocks. Sedimentary rocks contain trapped moisture that expands explosively at temperature. There are documented incidents of stones exploding when water is poured on them.
Inspect stones annually. Replace every 1–2 years with regular use (2–3 sessions per week). Degraded stones crumble into dust that blocks airflow through the stove.
Internal vs external loading
Internal loading (firebox door inside the sauna) is simpler to install and gives you the glow of the fire. External or through-wall loading keeps ash and debris out of the hot room and draws combustion air from outside rather than from the sauna. Through-wall installation requires a fire-safe wall penetration with non-combustible materials and adds complexity.
Flue and chimney
Twin-wall insulated stainless steel flue is the standard once the flue passes through the ceiling or roof. Single-wall vitreous enamel pipe can be used for the run from stove to ceiling — it radiates useful heat into the room.
Approved Document J governs flue installation. Key requirements:
- Minimum total flue height of 4.5 m from firebox to terminal for adequate draught
- Flue terminal at least 600 mm above the roof ridge if within 600 mm horizontally of the ridge
- Clearances from combustibles: typically 3× the flue diameter for single-wall pipe; 50–60 mm for twin-wall systems
- A rain cap and spark arrestor at the top
Most sauna stoves have a 115 mm flue outlet — smaller than the standard UK domestic stove size of 125–150 mm. Check compatibility when specifying the flue system. UK-made flue systems include Midtherm (West Midlands); imported systems include Schiedel ICID. Harvia also sell purpose-made chimney kits for their stoves.
UK regulations
There are two separate regulatory systems to consider: planning permission (whether you can put a building there) and Building Regulations (whether the building itself is safe). For a wood-fired sauna, the stove installation changes everything — even if the building itself is exempt from Building Control, the solid-fuel appliance is not.
This section covers the essentials. For a fuller treatment with four-nation comparison tables, see our planning permission guide.
Planning permission
Most garden saunas fall under Permitted Development in England. The key limits: maximum eaves height 2.5 m; if within 2 m of a boundary, maximum overall height 2.5 m; if more than 2 m from a boundary, maximum 4 m (dual-pitch roof) or 3 m (other roofs); must not cover more than 50% of garden area; must not be forward of the principal elevation.
Conservation areas, National Parks, AONBs, and listed building curtilage have additional restrictions. Scotland, Wales, and Northern Ireland each have their own rules — always check your local planning authority.
Building Regulations
Small detached outbuildings are often exempt from Building Control:
- Under 15 m² (no sleeping accommodation): generally exempt
- 15–30 m²: exempt if at least 1 m from any boundary or built substantially of non-combustible materials
- Over 30 m²: full Building Regulations apply
The stove changes everything
Installing a wood-burning stove is notifiable work under Approved Document J, regardless of building size. You must either use a HETAS-registered installer (who self-certifies under the Competent Person Scheme and notifies Building Control on your behalf) or apply directly to your local Building Control body for inspection and sign-off (typically £150–£400).
A HETAS installer cannot retrospectively sign off work they did not carry out. If you self-install and later want certification, you will need Building Control to inspect.
In Scotland and Northern Ireland, the HETAS Competent Person Scheme self-certification does not apply. Installers must contact the local authority directly.
Smoke Control Areas
In a Smoke Control Area, you can only burn wood if using a DEFRA-exempt appliance. Most Finnish and Estonian sauna stoves are not on the DEFRA exempt list — they have not been submitted for testing. If you are in an SCA, check your stove's exemption status before purchasing. The penalty for non-compliance is up to £300 per offence.
Check whether your area is covered at smokecontrol.defra.gov.uk or through your local council.
Carbon monoxide alarm
Approved Document J requires a CO alarm conforming to BS EN 50291, installed 1–3 m from any solid-fuel appliance. This is a legal requirement, not a recommendation.
Insurance
Most home insurers require notification of outbuildings with heating appliances. An installation without a HETAS Certificate of Compliance or Building Control Completion Certificate may mean the insurer refuses fire-related claims. Notify your insurer before installation, provide the compliance certificates, and keep chimney sweep records.

Interior finishing
Bench timber
Aspen is the traditional Finnish choice: very low thermal conductivity (it stays comfortable to sit on at 80–100 °C), no resin, smooth and splinter-free. Thermo-aspen (heat-treated) adds durability and a richer tone. Alder has similar properties with a warmer honey colour at slightly lower cost. Abachi has very low thermal conductivity — bench surface temperature at 90–110 °C air temperature does not exceed roughly 40 °C.
Never use oak for benches (extremely high thermal conductivity — it will burn skin), pressure-treated timber (releases toxic chemicals at sauna temperatures), or standard untreated pine with heavy resin content (weeps hot, sticky resin).
Bench dimensions
- Upper bench: 900–1,050 mm from floor, 600 mm deep minimum (700–750 mm for reclining)
- Lower bench: 450–600 mm from floor, 400–500 mm deep
- Gap between slats: 5–10 mm for air circulation
- Minimum length for reclining: 1,800 mm
- All fixings must be stainless steel and countersunk to prevent burns
Benches should be removable for cleaning. Build them as modular frames that lift out rather than fixed structures.
Surface treatments
Paraffin oil is the standard bench treatment — colourless, non-toxic, protects against sweat stains and moisture. Reapply every 6–12 months. Products like Tikkurila Supi Laudesuoja or Stelon Oy Sauna Paraffin Oil are widely available from UK sauna suppliers.
Never use varnish, polyurethane, or standard paint inside the hot room. These create a sealed film that becomes dangerously hot, blisters, and releases VOCs. Leaving wood untreated is common in Finnish tradition and is perfectly acceptable — treatment is mainly for hygiene and stain resistance.
Doors
Tempered glass doors (8–10 mm toughened glass) are the UK standard. They let light in, reduce claustrophobia, and allow supervision from outside. Timber doors offer better insulation but can warp with heat and humidity cycling.
The door must always open outward — if someone collapses, they must not be blocking rescue. Use magnetic catches or roller latches, never mechanical locks. Hinges must be stainless steel.
Lighting
All lighting inside the sauna must be rated to at least IP65. LED strips should be rated for 100 °C+. Place them below the upper bench or behind backrests — never in the highest heat zones near the ceiling, where even IP67-rated drivers will fail prematurely.
Fibre optic systems are the safest option: the light source (projector) mounts outside the sauna, and only glass fibres enter the hot room. All electrical work in a sauna is Part P notifiable and must be carried out by a registered electrician.

What it costs
Costs depend primarily on three things: the stove, the timber species, and whether you self-build, use a kit, or hire a turnkey installer.
Materials-only costs for a self-build
| Size | Budget (spruce/pine) | Mid-spec (thermo-aspen/Thermowood) | Premium (cedar, glass features) |
|---|---|---|---|
| 2-person (~1.5 × 1.5 m) | £1,500–£2,500 | £2,500–£3,500 | £3,500–£5,000 |
| 4-person (~2.0 × 2.0 m) | £3,500–£5,000 | £5,000–£7,000 | £7,000–£10,000 |
| 6-person (~2.5 × 3.0 m) | £5,000–£7,500 | £7,500–£10,000 | £10,000–£14,000 |
Where the money goes
For a typical 4-person mid-spec build at around £5,000–£6,000 in materials:
- Stove and flue: ~35% — the single biggest line item. A good stove lasts 20+ years.
- Timber (structural, cladding, panelling, benches): ~28% — choice of species (spruce vs Thermowood vs cedar) is the biggest variable.
- Insulation and vapour barrier: ~8%
- Glass door: ~8%
- Foundation: ~7%
- Roofing (EPDM or shingles): ~5%
- HETAS/Building Control fees: ~6%
- Stones, CO alarm, lighting, hardware: ~3%
Self-build vs kit vs turnkey
| Route | 2-person | 4-person | 6-person |
|---|---|---|---|
| Self-build (materials only) | £1,500–£3,500 | £3,500–£7,000 | £5,000–£12,000 |
| Kit (delivered flat-pack) | £2,000–£4,000 | £4,000–£8,000 | £6,000–£17,000 |
| Turnkey (fully installed) | £8,000–£15,000 | £12,000–£25,000 | £20,000–£55,000+ |
A self-build saves 20–40% over a kit, but adds design time, sourcing effort, and the risk of mistakes. A kit saves time and reduces waste but constrains your layout. Turnkey installation includes foundations, structure, fit-out, stove, and flue sign-off — the premium is mainly labour, logistics, and guarantees.

Common mistakes
These are the errors that come up repeatedly in forum discussions, builder feedback, and documented UK builds. Most are avoidable with planning.
Vapour barrier on the wrong side
The aluminium foil must be on the warm side of the insulation. Placing it on the cold side traps moisture inside the wall cavity and guarantees structural rot. This is the most frequently cited cause of premature sauna failure.
No air gap behind the panelling
Without a 15–25 mm gap between the foil and the interior cladding, moisture is trapped against the back of the panelling. The cladding rots from behind within 3–5 years. This is reported as the single most common structural failure in UK saunas.
Using standard insulation products in the hot room
Standard PIR boards (Celotex, Kingspan construction products) can degrade at sustained sauna temperatures and release toxic gases. Standard polyethylene vapour barriers soften and fail. EPS polystyrene melts. Use mineral wool for insulation and aluminium foil for the vapour barrier — these are the materials that belong in a sauna.
Undersized stove
Buying a stove based on room volume alone, without accounting for heat loss through glass or uninsulated surfaces, is a common sizing error. Large glazing panels (popular in modern designs) have an R-value near zero and create a radiant cold wall effect in UK winters. Add 1.0 m³ to your volume calculation for every m² of glass.
Inadequate ventilation
Sealing the room tight to conserve heat is counterproductive. Without proper intake and exhaust, the stove struggles for combustion air, CO&sub2; builds up, the air feels heavy, and moisture cannot escape. After each session, open all vents and crack the door while residual heat dries the structure.
Poor foundation drainage
Siting the sauna on the lowest, wettest part of the garden without drainage leads to base-edge rot. Water pooling against timber is the most common long-term failure mode in the UK climate. Slope the ground away, add French drains if needed, and keep timber 150 mm above ground level.
Resinous timber on benches
Pine, spruce, and larch bleed resin at sauna temperatures. Hot resin on bare skin causes burns. Use aspen, alder, or abachi for any surface that contacts skin.
Not drying the sauna after use
This is more damaging in the UK than in Scandinavia. Higher ambient humidity means a sauna that is not aired after each session develops mould faster. After the last session, leave both vents fully open while the stove cools. The residual heat carries moisture out of the timber. Then leave the door ajar until fully cooled.
Skipping Building Control notification
Self-builders commonly do not realise that a wood-burning stove installation requires notification regardless of building size. Without a HETAS Certificate or Building Control sign-off, you have no compliance documentation — which affects insurance cover and property sale.
Not checking Smoke Control Area status
Most Finnish sauna stoves are not DEFRA-exempt. Using a non-exempt stove in a Smoke Control Area is an offence under the Clean Air Act 1993. Check before you buy.
Next steps
A wood-fired sauna is a straightforward build if you respect the fundamentals: a stable, well-drained base; a properly insulated and vapour-controlled envelope; adequate ventilation; and a correctly sized stove with a compliant flue installation.
The most common mistakes — vapour barrier on the wrong side, no air gap behind the panelling, standard insulation products in the hot room — are all avoidable with basic understanding of how moisture moves through a heated structure.
If you are planning a build, start with the stove. Its output rating determines your room volume, which determines everything else: foundation size, timber quantities, insulation area, and ventilation sizing. Work outward from there.
For help finding an experienced sauna builder in your area, see our UK sauna builder directory. For guidance on planning consent, read our planning permission guide.
Frequently asked questions
- Most garden saunas fall under Permitted Development in England if they meet the size and position limits: maximum 2.5 m height within 2 m of a boundary, maximum 4 m height (dual-pitch) further away, single storey, not forward of the house, and not covering more than 50% of the garden. Conservation areas, AONBs, National Parks, and listed buildings have additional restrictions. Scotland, Wales, and Northern Ireland have their own rules. Check with your local planning authority if in doubt.
- The building itself may be exempt if it is under 15 m² with no sleeping accommodation, or 15–30 m² if at least 1 m from any boundary. However, installing a wood-burning stove is always notifiable work under Approved Document J, regardless of building size. You must either use a HETAS-registered installer or apply directly to Building Control.
- Materials only for a 4-person self-build typically run £3,500–£7,000 depending on timber and stove choice. A kit cabin costs £4,000–£8,000 delivered. A turnkey installation from a specialist builder runs £12,000–£25,000+ for the same size. The stove and flue system account for roughly 35% of the materials budget.
- Mineral wool (stone wool / rock wool) is the standard — it is non-combustible and withstands temperatures well over 1,000 °C. Use 100 mm in walls and 150 mm in the ceiling. Standard PIR boards (Celotex, Kingspan) should not be used in the hot room as they can degrade at sauna temperatures. EPS and XPS polystyrene are also unsuitable. The vapour barrier must be aluminium foil, not polyethylene.
- Start with your sauna's internal volume in cubic metres. Add 1.0 m³ per m² of glass and 1.2 m³ per m² of uninsulated log wall. Then select a stove rated for the middle of your adjusted volume range. As a rough guide: a 2-person sauna (6–8 m³) needs around 8–13 kW; a 4-person (10–14 m³) needs 13–20 kW; a 6-person (16–22 m³) needs 15–24 kW.
- Only if the stove is on the DEFRA exempt appliance list. Most Finnish and Estonian sauna stoves are not currently listed. Using a non-exempt stove in a Smoke Control Area is an offence under the Clean Air Act 1993, with fines of up to £300 per offence. Check your area's status at smokecontrol.defra.gov.uk before purchasing.
- Aspen, alder, or abachi. These species have low thermal conductivity — they stay comfortable to sit on at 80–100 °C — and produce no resin. Never use pine, spruce, larch, or oak for bench surfaces. Pine and spruce bleed resin at sauna temperatures, and oak conducts too much heat.
- Install an intake vent near floor level close to the stove, and an exhaust vent on the opposite wall. The exhaust works best at around 400 mm above floor level, below the benches. Use adjustable dampers. Target roughly 6 air changes per hour. After each session, open all vents fully and crack the door to let residual heat dry the structure.
Do I need planning permission for a wood-fired sauna in my garden?
Do I need Building Regulations approval?
How much does it cost to build a wood-fired sauna?
What insulation should I use in a sauna?
What size stove do I need?
Can I use a wood-fired sauna stove in a Smoke Control Area?
What timber should I use for sauna benches?
How do I ventilate a wood-fired sauna?
Related guides
Planning Permission for a Wood-Fired Sauna in the UK
Permitted development rules, building regulations, flue requirements, and what you actually need to do before installing a wood-fired sauna in your garden.
Getting startedBeginner’s Guide to a Wood-Fired Sauna Visit
First wood-fired sauna visit? What to bring, how long to stay, session structure, cooling down, safety and etiquette — a practical UK guide for beginners.
Getting startedWood-Fired vs Electric Sauna: What’s the Difference?
Practical comparison of wood-fired and electric saunas covering heat, running costs, installation, UK regulations, and which suits different settings.